How to Upload a Picture to a Printed Document Without It Distorting
Your Biggest Moments, Made Bigger
How to Enlarge a Photo for Printing
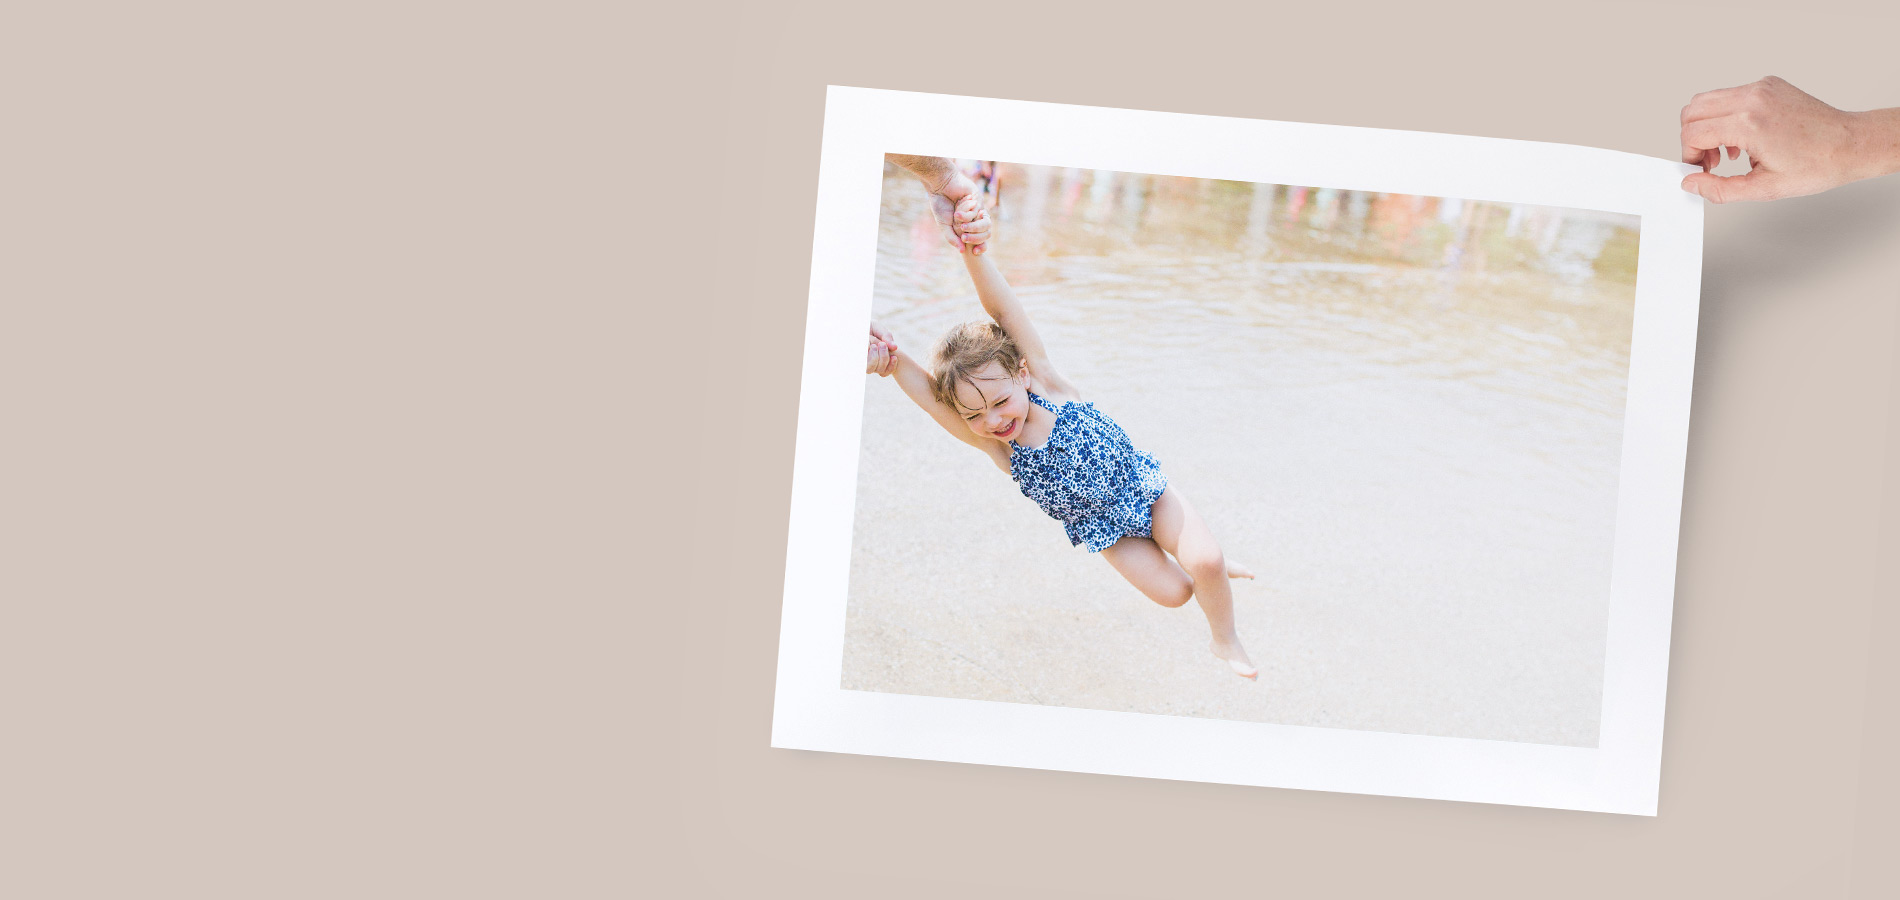
Some moments leave their marking — and, whether it's a wedding day or that weekend getaway, the way we display them should do the same. Unfortunately, information technology'southward not always as easy as i would call back to overstate an epitome without losing quality.
We hear you! So we're sharing some unproblematic steps nosotros can all accept to accident up photos crisply — regardless of software or skill-level. May it help turn those picayune moments you concord shut into the large prints yous brandish proudly.
It All Comes Down to Quality
Once upon a time, it took a loftier-finish digital photographic camera to capture photos worth enlarging or a photo lab scanner to enlarge a photograph impress. Merely in the days of modern smartphone cameras with lenses that surpass x megapixels, whatever paradigm from your camera has the potential to become a beautiful Big Format Print. (To give y'all an idea, the iPhone 11 has a 12 megapixel lens!)
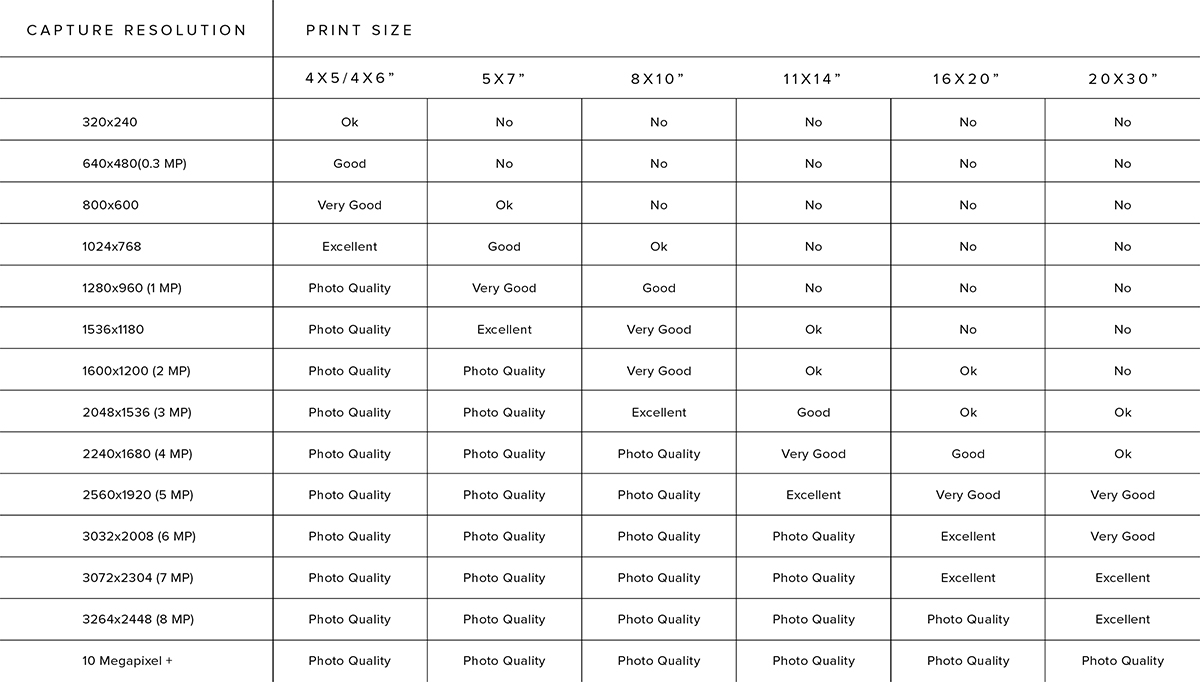
The kickoff pace is getting a sense of only how large you can go with an epitome you love. It all boils down to dots per inch (DPI), aka the number of dots printed in every inch of your prototype. The more dots, the clearer the image. The lower the DPI, the grainier the result and the lower the quality. Nosotros'll evidence you how to determine your photo'southward DPI in just a bit.
What's the Best DPI for Printing?
For the highest quality photo prints, we generally recommend 300 DPI. (This is what yous'll hear referred to equally a "giclée" impress sometimes.) Nevertheless, nearly images volition still wait adept and avert pixelation at 150 DPI or above. But put: Don't blow up photos to more than double what the max size was at total quality. Anything below 150 DPI, and our editor will warn yous that you're uploading a low-resolution image.
It'due south also worth noting that photos from your telephone, Facebook, or Instagram are more often than not sized for the web at 72 DPI — no matter how powerful your smartphone camera is. Luckily, this is easy enough to suit.
How to Enlarge an Image to Print
Your calculator's native photograph editing tools are generally all you need to adjust DPI and get your photo fix for print. (If yous have Photoshop or other similar photo editing software, we'll get into some additional things you can do subsequently in this post.) Tuning DPI will besides testify you lot the largest size at which you can keep the original quality of your photo.
- Double-click your file to open it in preview. (To open up multiple images, highlight them all, right click, and click "open.")
- In the menu bar, click on "Tools".
- Select "Adjust Size" in the "Tools" dropdown card. (You should now see adjustable cells for Width, Height, and Resolution prove up.)
- Choose "inches" for Width and Summit and "pixels/inch" for Resolution. (For our purposes we can treat pixels/inch and DPI as ane and the same.)
- Uncheck the "Resample Image" checkbox and set your Resolution to 300 pixels/inch. The dimensions for your maximum Width and Height at 300 DPI will appear automatically.
- Once you resize your image to your liking, click okay and save the file. (Don't worry about getting the aspect ratio merely right, you lot can easily crop in our editor!)
One time you know your maximum Width and Pinnacle at 300 DPI, you can play around to run across how big you tin can become without losing too much quality. At the end of the solar day, it's really up to you whether size or quality is more of import for the photograph at manus.
A Little Play tricks to Go Bigger
Expressionless assault enlarging a digital image, just can't get the resolution you need at the size you want? Go the image printed at its max size at 300 DPI, then scan it. While it might seem counterintuitive, the high resolution of the scanner will allow yous to enlarge the image upwards to 4 times the size. Nosotros encompass how that works correct beneath.
How to Enlarge Sometime Photos Without Losing Quality

Scanning one-time photos comes with its own considerations — but much like their digital counterparts, enlarging printed photos is a matter of DPI. In this case, it all comes downwards to the DPI of the scanner. Many at-home scanners can capture images at upwardly to 1200 DPI — iv times the resolution needed to produce a loftier-quality impress! That means you lot should be able to scan a print and reprint information technology four times larger, all the while keeping the quality of the scanned paradigm.
First past increasing the resolution in your scanner settings, as it most probable won't be set to 1200 DPI automatically. Once you scan the image, you'll need to adjust the resolution on the digital file too. Just follow the same steps from earlier in the post!
Setting Photos Up for Success

When you lot accident up a photo across its original size, you're going to lose some resolution — or only put, you're going to lose quality. It'south a bit similar rolling out dough: You can only ringlet it out so thin before information technology becomes as well thin. Withal, that doesn't mean at that place aren't ways to minimize the loss for meaningful photos you lot'd like to put front and center.
Better withal, you tin set yourself up for success in the first place by following some simple tips.
Utilise Your Digital Photographic camera When Information technology Counts
If you lot've bought a digital camera in the past v years, it's probably safe to assume that it captures crisper photos than your new smartphone. Practice a little inquiry to come across which of the two has a higher megapixel lens, and make sure to utilise that photographic camera for the shots you may want to put on display later.
Shoot Using the Largest Size Possible
If you're shooting in raw, you're probably fine. Simply if you choose to shoot in jpeg, information technology's important that you set your photographic camera to the highest possible quality settings. The higher the quality of the jpeg, the larger you tin can print a photo without losing quality.
Eliminate "Digital Noise" When Shooting
By using a low ISO when shooting, you can eliminate the grain or "noise" that surfaces at photos shot with a college ISO. To capture a bright image at a low ISO, effort decreasing shutter speed for a longer exposure. Just note that this will go far all the more important to keep your camera shake at a minimum.
How to Overstate an Image in Photoshop
Take Adobe Photoshop on your computer? That changes things just a bit. Y'all yet won't be able to (and probably shouldn't) enlarge your image to desperate proportions, only the quality will be better if yous follow these steps:
- Open your image in Photoshop.
- Become to the Prototype Size dialog, check resample, and select "Preserve Details" in the corresponding dropdown card.
- Brand sure the Resolution is set up to 300 Pixels/Inch.
- Set Width and Summit to inches and adjust to enlarge your epitome. (Call back, y'all probably don't want to go beyond twice the size of your original image!)
- Relieve the now enlarged image equally a "Smart Object" if you haven't already.
- Duplicate the layer and set the blend mode to "soft light."
- Apply a "High Laissez passer" filter.
- Create an enhanced edge by adjusting the preview. (This will take a few tries to dial in!)
Related Articles
Source: https://www.artifactuprising.com/diy/how-to-enlarge-photo
0 Response to "How to Upload a Picture to a Printed Document Without It Distorting"
Post a Comment